How I create sprawling cyberpunk vistas using Cinema4D and Photoshop
(Image credit: Darius Puia) Copy link Facebook X Whatsapp Pinterest Flipboard Email Share this article 0 Join the conversation Follow us Add us as a preferred source on Google Newsletter Subscribe to our newsletter ‘Lost in the Endless’ draws inspiration from the manga Blame! written and…
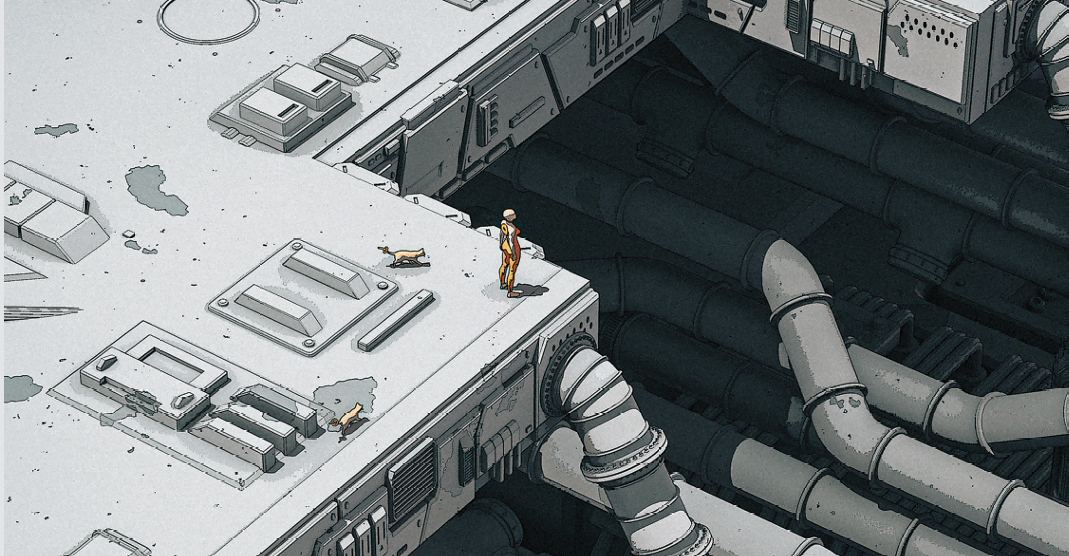
(Image credit: Darius Puia) Copy link Facebook X Whatsapp Pinterest Flipboard Email Share this article 0 Join the conversation Follow us Add us as a preferred source on Google Newsletter Subscribe to our newsletter ‘Lost in the Endless’ draws inspiration from the manga Blame! written and illustrated by Tsutomu Nihei (and featured in Monthly Afternoon magazine from 1997 to 2003. I was particularly influenced by its vast industrial environments and the constant sense of unease they create. I wanted to capture that feeling of exploration within an unknown hostile space, where danger feels ever-present but is never fully revealed, keeping the viewer in suspense.I also incorporated hallmarks of my own work. The girl and the cat are a recurring theme to provide a subtle emotional anchor within the overwhelming scale of the environment. To reinforce the dystopian atmosphere, I kept the colour palette muted and desaturated, enhancing the sense of isolation and tension.The base scene was created in Maxon Cinema4D, with shading, lighting and rendering handled in Autodesk Arnold – see our guides to the best 3D modelling software and the best rendering software. Final adjustments, colour grading and additional details were completed in Adobe Photoshop.Get Cinema4D from Maxon 01. Blocking and composition I start by blocking out the scene to define the overall idea. I quickly dress the environment and position the camera early, because I like to see the composition take shape fast. I keep a mood board, on my iPad, nearby to constantly reference and guide the direction of the artwork. (Image credit: Darius Puia) 02. Lighting and textures Once the composition is set, I focus on the lighting and textures. I use strong, hard lighting to create sharp, defined shadows and a bold look. I refine materials to achieve a retro anime feel, using Arnold’s node system while adding noise for subtle imperfections. 03. Final polish in post After rendering, I move into Adobe Photoshop for the final touches. I enhance the storytelling by adding small details, props or character accents like glowing tattoos. I also handle colour grading and lighting at this stage, often using Adobe Camera Raw presets for consistency. (Image credit: Darius Puia)If you're building your own creative setup, you might also want one of the best laptops for 3D modelling or the best drawing tablets.Get the Creative Bloq NewsletterSign up to Creative Bloq's daily newsletter, which brings you the latest news and inspiration from the worlds of art, design and technology. TOPICS Darius PuiaDarius is a digital artist specialising in hyper-detailed cyberpunk and dystopian worlds, blending 3D and digital painting. His work focuses on atmosphere, storytelling and immersive environments inspired by science fiction and anime. View More You must confirm your public display name before commenting Please logout and then login again, you will then be prompted to enter your display name. Logout LATEST ARTICLES 1 The creator of Halloween and The Thing is releasing a 132-page dystopian horror comic paired with a 14-track synth metal album that rocks like it's 1986 2 This Blender Deep Paint artist makes 3D look like a children's book brought to life 3 9 beautiful air purifiers that won’t ruin your home aesthetic 4 No Trump, your Newsweek magazine cover isn’t a compliment 5 Hifiman Edition XV vs Thieaudio Cypher: Which $400 audiophile headphone should you buy?Source: Creative Bloq AI Art — Published — Category: Image AI